原创文章,转载请注明出处
https://qiedd.com/
小鸡太多?教你用 Caddy 和 Dnspod 来自建CDN!
这里使用 Arch Linux 作为示例,其他系统安装 Caddy 请查看官方文档!
Caddy 配置通用!
本质上就是反代+缓存!
安装所需工具
# Arch
pacman -S caddy go redis --needed

# 设置开机启动
systemctl enable caddy
systemctl enable redis
systemctl start redis
编译 Caddy
https://github.com/caddyserver/xcaddy
由于 Caddy 是模块化的,缓存插件需要额外编译,需要安装go
这里我们使用官方提供的 xcaddy 来构建属于我们自己的 Caddy
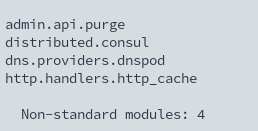
# 下载xcaddy
wget https://github.com/caddyserver/xcaddy/releases/download/v0.2.0/xcaddy_0.2.0_linux_amd64.tar.gz

# 创建目录
mkdir caddy

# 解压
tar xvf xcaddy_0.2.0_linux_amd64.tar.gz -C caddy

# 进入目录,准备编译
cd caddy

# 编译
./xcaddy build --with github.com/caddy-dns/dnspod --with github.com/sillygod/cdp-cache

# 移除原有的caddy
rm /usr/bin/caddy

# 将我们自己编译好的挪过去
cp caddy /usr/bin/caddy

# 查看模块
caddy list-modules
Caddyfile
这是我的 Caddyfile
原有的配置可以注释或者删除
已开启 HTTP2/HTTP3 支持
# /etc/caddy/Caddyfile

{
        order http_cache before reverse_proxy
        servers :443 {
                protocol {
                        allow_h2c
                        experimental_http3
                }
        }
        servers :80 {
                protocol {
                        allow_h2c
                        experimental_http3
                }
        }
}
import /etc/caddy/conf.d/*
然后在 /etc/caddy/conf.d/ 中配置一个网站文件,任意名称即可
使用 Redis 作为缓存,我们选择不缓存后台
如果需要使用内存或者硬盘作为缓存,请查看示例
https://github.com/sillygod/cdp-cache/tree/master/example
如果是 国际版Dnspod,那么我们需要使用 acme.sh 来申请证书
有关 acme.sh 的 dnsapi 说明 https://github.com/acmesh-official/acme.sh/wiki/dnsapi
# 安装依赖
pacman -S acme.sh socat

# 导入APIKEY
export DPI_Id="1234"
export DPI_Key="sADDsdasdgdsf"

# 使用acme.sh申请证书
acme.sh --issue --server letsencrypt --dns dns_dpi -d wordpress.com -d www.wordpress.com

# 安装证书
acme.sh --install-cert -d wordpress.com -d www.wordpress.com \
                               --key-file      /www/wordpress/key.pem  \
                               --fullchain-file /www/wordpress/cert.pem

# 自动更新证书
acme.sh --upgrade --auto-upgrade

# 更改权限
chown -R caddy /www/wordpress/*
chgrp -R caddy /www/wordpress/

# WordPress配置
vim /etc/caddy/conf.d/wordpress.conf

wordpress.com {
        tls /www/wordpress/cert.pem /www/wordpress/key.pem
        @cache_path {
                path /
                not path /wp-admin
        }
        http_cache {
                cache_type redis
                redis_connection_setting localhost:6379
                match_path @cache_path
        }
        reverse_proxy {
                to https://wordpress.com
                header_up Host wordpress.com
                buffer_responses
                max_buffer_size 256000000
        }
}
如果是 国内版Dnspod,那么我们可以使用 API 来申请证书
首先,需要在控制面板获取自己的API key
# WordPress配置
vim /etc/caddy/conf.d/wordpress.conf

wordpress.com {
        @cache_path {
                path /
                not path /wp-admin
        }
        tls {
                dns dnspod {env.DNSPOD_TOKEN}
        }
        http_cache {
                cache_type redis
                redis_connection_setting localhost:6379
                match_path @cache_path
        }
        reverse_proxy {
                to https://wordpress.com
                header_up Host wordpress.com
                buffer_responses
                max_buffer_size 256000000
        }
}
环境配置
需要修改 hosts 文件
# vim /etc/hosts

*** 这是hosts内容 ***
# Static table lookup for hostnames.
# See hosts(5) for details.
127.0.0.1   localhost localhost.localdomain localhost4 localhost4.localdomain4
::1         localhost localhost.localdomain localhost6 localhost6.localdomain6
你的IP  你的域名
如果是国内版 Dnspod
export DNSPOD_TOKEN="APP_KEY,TOKEN"

# 示例
export DNSPOD_TOKEN="123,4sfg6s4dggsdfgs565d5g6d65gg45"
开启防火墙
不开防火墙,redis被爆了可别赖我
这里我使用了ufw,方便管理
# 安装ufw
pacman -S ufw

# 开启端口,务必要开启ssh端口
ufw allow 80
ufw allow 443
ufw allow 22

# 启动ufw
ufw enable
systemctl enable ufw
systemctl start ufw

# 删除端口
# ufw delete allow 4396
测试启动
首先需要在 Dnspod 上添加解析的地区

然后进入目录
# 进入目录
cd /etc/caddy

# 测试启动
caddy start

# 如果成功
caddy stop

# 用systemd启动caddy
systemctl start caddy
你可以用此方法添加任意多的 CDN 节点

0 条评论